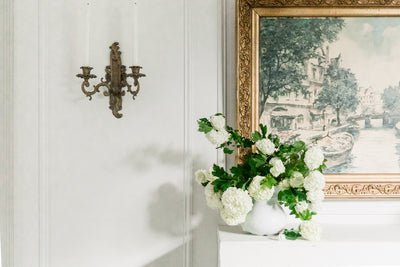
Creating A Floating Shelf- Kitchen
There's nothing more that I love than a good floating shelf- especially one with rustic barn wood. When designing our kitchen, I envisioned the back corner to encompass floating shelving. I love that you can display pretty dishes, artwork, utensils, etc. on open shelving.
To the left of the sink, we have a pot holder that holds all of our cast iron skillets. To the right of the sink, we have an open corner that was always meant for floating shelving. Originally, I had dreamt of the floating shelf being one large board that wrapped around the corner and spanned from window to window. It wasn't until we got our rustic barn wood that I started to think about different design options.
To the left of the sink, we have a pot holder that holds all of our cast iron skillets. To the right of the sink, we have an open corner that was always meant for floating shelving. Originally, I had dreamt of the floating shelf being one large board that wrapped around the corner and spanned from window to window. It wasn't until we got our rustic barn wood that I started to think about different design options.

A few months ago, I brought these SUPER large authentic bread boards home from our shoppe. I fell in love with them and they felt very European to me. I stuck them against the wall to hide the electrical outlet and they became a must-have to this wall.
The thought of losing this spot for the bread boards (if we wrapped the floating shelving around that corner) made me bummed. We have 9' ceilings and having these incredibly large bread boards against that wall just felt right. SO, after multiple thoughts of having two shelves vs. one AND having wrap around shelving vs. one single shelf- we opted for one single shelf for now to see how we like the floating shelf in this space.
The big and burning question of the week was HOW DID WE DO THIS? Well friends, it wasn't hard! We started by taking these 6" steel floating shelf brackets and we made sure to screw them into our wall studs.
Once our brackets were hung, we held our rustic barn wood (approx. 11" wide) that came from the family farm up to the brackets and marked where the brackets would slide into. Taylor then took a 9/16th drill bit and drilled out a long hole in the side of the board- *making sure to keep the hole straight so that we didn't puncture through the top/bottom of the board*.
 |
 |
Once our holes were cleaned out- it was as easy as sliding the board onto the brackets! Easy peasy, lemon squeezy.

What I love most about these steel brackets is the real floating effect it gives! They conceal nicely (especially if you have a super thick board) and once you have your items on the shelf- they very much disappear to the eye.

 |
 |
We were lucky and have our hands easily accessible to old barn wood, however, I know that's not the case for everyone. If you don't have access to barn wood or old wood slabs, I would search Facebook Marketplace or sites like these. Sometimes one can come across someone getting rid of a stash. Another option would be to go to the hardware and get a nice thick pine board to your desired width and "age" and patina it yourself!

I sure hope this super easy DIY project empowers you to finish or redesign your space! It's really not hard and can instantly change the look of your room! We will see how this one shelf does for us in the kitchen. We may end up adding a second shelf above it someday... we shall see!
Hugs, Alyssa

Love the shelves and all your touches! Home is gorgeous! Love following along! 💕
I LOVE the bread boards. Will you be restocking them soon? Or have another source?
Thanks Haley
Leave a comment